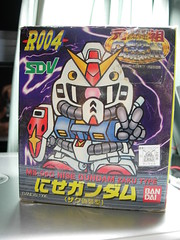
SD Nise Gundam (Ganso Bandai HK)
Name: SD Nise Gundam
Series: Ganso SD Gundam
Number: R004 (Hong Kong release)
Started: ????? 2008
Completed: March 10
It's been ages since I updated this blog ^^; I haven't abandoned it and last week I decided to start doing gunpla again and finish my SD Nise Gundam which has been lying half built in my cupboard. This kit is part of the Ganso SD gundam bunch that I bought online more than 2 years ago (!!!!). I have many more unbuilt kits stacked up in the cupboard..... will take a few years to go through them all :0
I'm typing this while on the train back from work- on a different note, I LOVE my LG X110 netbook! It'll take like about 50-60 min to get home so I think my blog should be more active from now....hopefully.
See also:
SD Musha Gundam (Ganso Bandai HK)
SD Gundams and Keroro madness!
Currently, I'm in the process of masking and painting; the last main step before finishing a gundam kit. I'm not planning to weather this one- just a nice clean build would be perfect. Will probably finish it by the end of the month.

New gundams are much more detailed and are generally less painful to mask but I'm willing to fight through this one coz I really like the SD Nise Gundam design- looks funny- and I haven't come across any other Nise Gundams in the market (SD, HGUC, MG, PG..... etc etc). "Nise" means "fake"- I think- and it's quite obvious why it was called that; the gundam is basically an RX-78 with a Zaku head ^^;

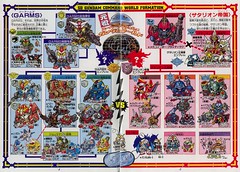
Found some rare SD Ganso catalogues on this Japanese site. I don't read Japanese so don't ask me about it ^^; Notice the cute Nise Gundam on the bottom of the second page.

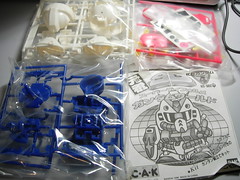
The pieces are few and they're made from a tougher kind of plastic (much harder to cut and to sand than the normal Gundams). The yellow parts are made from a rubbery type of plastic which paints/primers have a hard time trying to stick onto. Solution: use sandpaper to make the surface all rough.


Seam lines are everywhere so lots of sanding, puttying and patience are required:p

A Zaku's classic weapon- rifle axe- which I did a quick puttying job to fill up the gap. Did the same with the back of the shield.

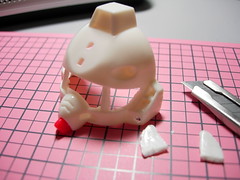
The side portions of the visor was covered/molded so I decided to cut them out. Didn't do a too bad job :)


0 Comments:
Post a Comment
<< Home